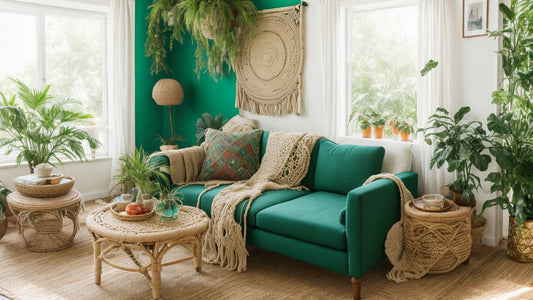
The Most Effective Method for Hanging Tapestries

Share
Tapestry Magic: Hanging Hacks for Wall Art Wow
Unleash the inner boho-chic in your home with the majestic beauty of tapestries! These woven wonders breathe life into walls, transforming spaces into vibrant storytelling havens. But how do you get that breathtaking tapestry gracing your space without, well, botching it? Fear not, intrepid decorator, for this guide is your secret weapon to tapestry-hanging triumph!
Before You Hang High: Essential Considerations
Before the hammering commences, a moment of mindful prep is key. Here's what you need to ponder:
- Tapestry Type: Is your treasure a lightweight wonder or a woven behemoth? Knowing the weight helps choose the right hanging method.
- Wall Material: Brick, drywall, plaster – each demands a specific approach. Mismatch, and you might end up with a tapestry face-planting on the floor.
- Desired Look: Do you crave a taut, museum-like display or a relaxed, bohemian drape? This preference impacts your hanging hardware.
- Permanent or Temporary: Are you committing to this spot, or is your tapestry a wandering soul? This determines the level of wall "intervention" required.
Hanging Heroes: A Tapestry Arsenal
Now, let's explore the fantastic array of hanging methods at your disposal:
- The Classic Cavalry: Rod and Pocket Power
This tried-and-true method is perfect for tapestries with sewn-in pockets. Simply slide a sturdy dowel rod through the pocket and voila! Mount brackets on the wall to support the rod, and adjust the height for the perfect placement. Bonus points for decorative finials that add a touch of flair!
- Commando Crew: Damage-Free Delight
No wall-wrecking here! Adhesive hooks come in a variety of strengths, making them ideal for lighter tapestries. Choose hooks rated for the tapestry's weight and follow the manufacturer's instructions for a secure bond. Just remember, these work best on smooth, non-textured surfaces.
- Nail It!: The Straight-Shooting Approach
For a straightforward, permanent solution, nails are your friends. Use upholstery nails for a polished look, or opt for discreet pushpins for lighter tapestries. Ensure the nails are strong enough for the weight and spaced evenly for balanced support. Remember, this method leaves permanent marks, so choose your location wisely!
- Threadbare Thrill: The Rustic Revelation
Embrace the rustic charm of hanging your tapestry with simple twine or yarn. Tie loops to the corners of the tapestry and secure them to wall hooks or nails. This method works best for lightweight tapestries and adds a touch of bohemian whimsy to your space.
- Framed and Fabulous: The Gallery-Worthy Option

Transform your tapestry into a museum-worthy masterpiece by stretching it over a wooden frame. This method works best for smaller tapestries and requires some DIY skills. However, the polished look and added protection make it a worthwhile investment for precious pieces.
Read More: How to Make a Statement with Living Room Wall Decor
Bonus Round: Creative Hacks for Tapestry Triumph
- Double-Duty Diva: Hang your tapestry over a headboard or doorway for an instant room makeover.
- Layered Luxe: Combine tapestries of different textures and sizes for a dynamic wall display.
- Light Fantastic: String fairy lights behind your tapestry for a magical, glowing effect.
- Greenery Galore: Mount shelves beneath your tapestry and showcase your favorite plants.
Pro Tips for Hanging Harmony

- Measure twice, hang once: Mark the tapestry's placement on the wall before committing to hardware.
- Level Up: Use a spirit level to ensure your tapestry hangs straight and true.
- Safety First: Check furniture placement to avoid snags and rips.
- Material Matters: Consider the tapestry's material when choosing cleaning methods.


