How to Hang Plates on the Wall: A Complete Guide
Share
How to hang plates on the wall: A comprehensive guide
Hanging plates on the wall is a great way to add personality and style to your home décor. It can also be a fun and easy DIY project. In this blog post, we will walk you through the steps of how to hang plates on the wall, using both plate hangers and adhesive discs.
Materials needed:
- Plates
- Plate hangers or adhesive discs
- Hammer
- Nails
- Measuring tape
- Pencil
- Level
- Paper (optional)
- Painter's tape (optional)
Instructions:
1. Choose the right plate hangers or adhesive discs.
There are two main ways to hang plates on the wall: with plate hangers or adhesive discs. Plate hangers are metal or plastic devices that attach to the back of the plate and have a hook that you can hang over a nail. Adhesive discs are self-adhesive pads that you stick to the back of the plate and then hang on the wall.
When choosing plate hangers, make sure to select the right size for your plates. The hanger should be slightly smaller than the plate, so that it fits snugly. Adhesive discs come in a variety of sizes, so make sure to choose ones that are large enough to support the weight of your plates.
2. Clean the plates.
Before you hang your plates, it is important to clean them thoroughly. This will remove any dirt or grease that could prevent the hangers or adhesive discs from sticking properly. You can clean your plates with mild soap and water, or with a dish soap that is specifically designed for delicate dishes.
3. Mark the location of the plates on the wall.
Once your plates are clean, it is time to mark the location of each plate on the wall. You can do this by using paper templates, painter's tape, or a level.
To use paper templates:
- Trace around each plate on a piece of paper.
- Cut out the tracings.
- Tape the tracings to the wall in the desired arrangement.
- Use a pencil to mark the center of each plate on the wall.
To use painter's tape:
- Place a piece of painter's tape on the wall where you want to hang each plate.
- Use a pencil to mark the center of each plate on the painter's tape.
To use a level:
- Hold the level against the wall where you want to hang each plate.
- Mark the center of each plate on the wall with a pencil.
4. Attach the plate hangers or adhesive discs.
Once you have marked the location of each plate on the wall, it is time to attach the plate hangers or adhesive discs.
To attach plate hangers:
- Follow the instructions that came with your plate hangers.
- Most plate hangers attach to the back of the plate with screws or nails.
- Once the plate hanger is attached, make sure to adjust the height so that the plate will hang level.
To attach adhesive discs:
- Follow the instructions that came with your adhesive discs.
- Most adhesive discs simply peel and stick to the back of the plate.
- Once the adhesive disc is attached, make sure to press it firmly against the plate.
5. Hang the plates on the wall.
Once the plate hangers or adhesive discs are attached, it is time to hang the plates on the wall.
To hang plates with plate hangers:
- Simply hang the hook of the plate hanger over the nail that you hammered into the wall.
To hang plates with adhesive discs:
- Press the adhesive disc firmly against the wall.
- Hold the plate in place for a few seconds to allow the adhesive to bond with the wall.
6. Step back and admire your work!
Once all of your plates are hung, step back and admire your work. You can now enjoy your beautiful and unique wall décor.
Also Read: The Best Method to Hang a Large Mirror
Additional tips:
- If you are hanging a heavy plate, it is a good idea to use two plate hangers or adhesive discs for support.
- If you are hanging plates in a humid environment, it is important to use adhesive discs that are specifically designed for humid environments.
- If you are hanging plates on a textured wall, you may need to use a stronger adhesive disc.
- If you are hanging plates on a painted wall, it is important to allow the paint to dry completely before hanging the plates.
Creating a gallery wall with plates
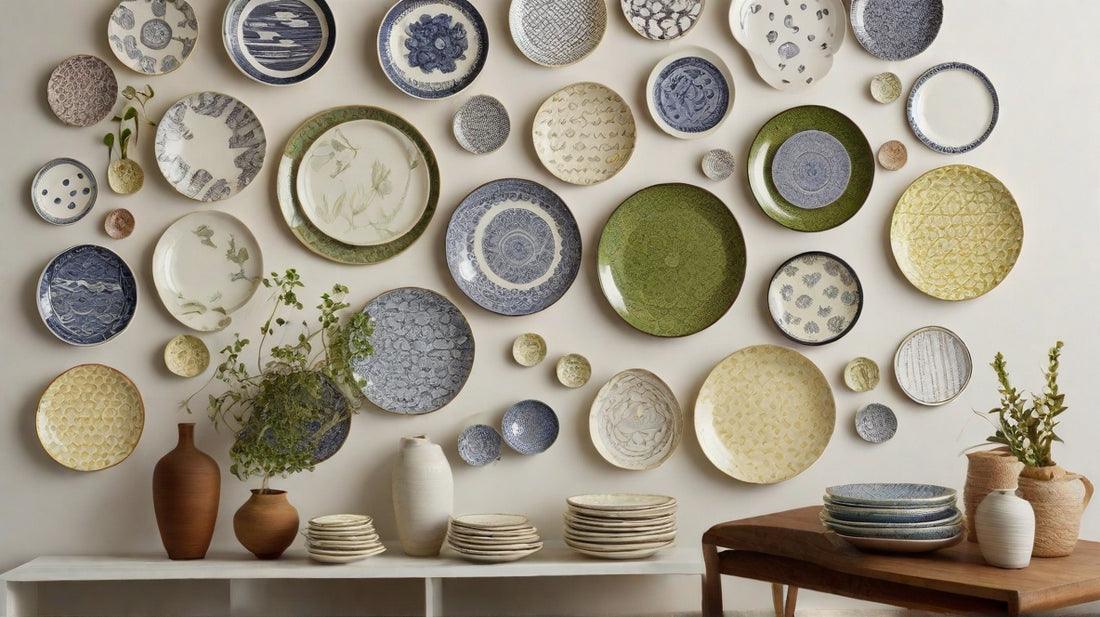
A gallery wall is a great way to display a collection of plates. To create a gallery wall, simply arrange the plates on the wall in a way that you like. You can use a variety of different sizes and shapes of plates, as well as plates with different patterns and colors.
One way to create a gallery wall is to use a grid layout. To do this, measure the wall space where you want to hang the plates and divide it into equal squares. Then, hang the plates in the center of each square.
Another way to create a gallery wall is to use a more organic layout. To do this, simply arrange the plates in a way that you find pleasing. You can overlap the plates, hang them at different heights, and create different patterns.
Once you have arranged the plates on the wall, mark the location of each plate with a pencil. Then, attach the plate hangers or adhesive discs and hang the plates on the wall.
Here are some tips for creating a gallery wall with plates:
- Choose a variety of different sizes, shapes, patterns, and colors of plates. This will create a more interesting and visually appealing display.
- Use a grid layout or an organic layout, depending on your personal preference.
- Experiment with different arrangements until you find one that you like.
- Don't be afraid to overlap the plates or hang them at different heights.
- Use a level to make sure that the plates are hanging straight.
- Step back and admire your work!
Here are some additional ideas for hanging plates on the wall:

- Hang plates in a kitchen or dining room to create a focal point.
- Hang plates in a living room or hallway to add personality and style.
- Hang plates in a child's bedroom or playroom to create a fun and whimsical space.
- Hang plates on a patio or porch to add a touch of whimsy to your outdoor living space.
- Hang plates in a commercial space, such as a restaurant or boutique, to create a unique and inviting atmosphere.

